The WooCommerce shipping rate by city plugins works like a new shipping method. So in order to assign it you first need to create a shipping zone in Woocommerce > Settings >Shipping
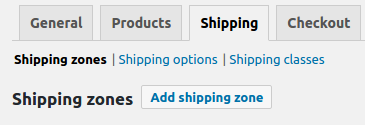

Once the Shipping Zone it’s created, we add the Shipping methodd called “Shipping rate by city”

A new panel will appear where you can change some options:
- Method Title: This is the name that will appear in the order view, checkout, etc.
- Select2 Library: This library JQuery gives you a customizable select box with support for searching and it’s included by default with the plugin.
- Required Field: If you checked “yes/no” this field will be required or not, if you checked “Managed by third parties” this field will be managed by the hook “woocommerce_checkout_fields” or some other plugin.
In the same Setting Page, you are able to add the prices of each city or county in two different ways.

Manually adding prices
Click on “Add Place” and a new row will appear where you can choose the country and the state (In case it’s not defined in the main zone), type the name of the county (in case you need it), and the name of the city and finally, the price.
Also, you can specify the default price for other locations.
Import File
Or you can import a CSV/TXT file with the zones and prices.
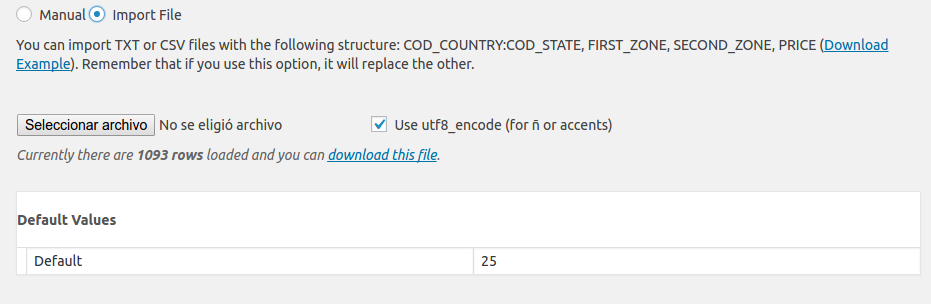
To use the csv option use the following format in your file
US:CA,Zone1,Zone5,5
US:CA,,Zone6,7
If the country is not using states, like this:
CO:,Zone1,Zone5,1000
CO:,Zone1,Zone6,2000
Conditions
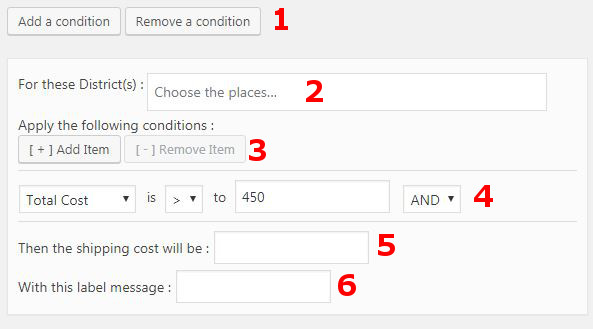
- To add or remove last condition
- Apply to selected County only
- Add new condition item to the country
- The items are conditions as total cost, weight or products number in the cart. You can connect those conditions with OR and AND operators.
- If the conditions are true, the price that will appear.
- If the conditions are true, the label that will appear.
To add conditions first you must fill your places either manually or by importing a CSV.
The first condition that matches will be used.